
Coffee Table
I have been wanting a coffee table to go in a small space, but haven't been able to find anything affordable and appropriately awesome, so I decided I would just have to go to plan B - which is usually make it myself and hope it turns out! My first part of this challenge was scouring around for all my supplies. I needed a coffee table of a certain size and height, and an old hymnal - I was picky too, I didn't just want any hymnal, but I wanted songs I KNEW and LOVED! I was pleasantly surprised to find everything I needed quickly and with very little effort on my part! I argued back and forth with myself in my head about painting the coffee table itself or doing anything else to it...but in the end the head of household here made that call, ha! So it was left alone.
I scoured through the hymnal for my favorite songs, because if I was going to do this it needed to hold meaning too, for me and my family. Things in my living room need to have LIFE for me, and finding the right songs was a huge part of this project. I tore out the song I chose (only ruining one, whew) and decided to leave the edges as they were, so some places there is a straight edge and others you can see where it was ripped from the book, which I think gives it more character.
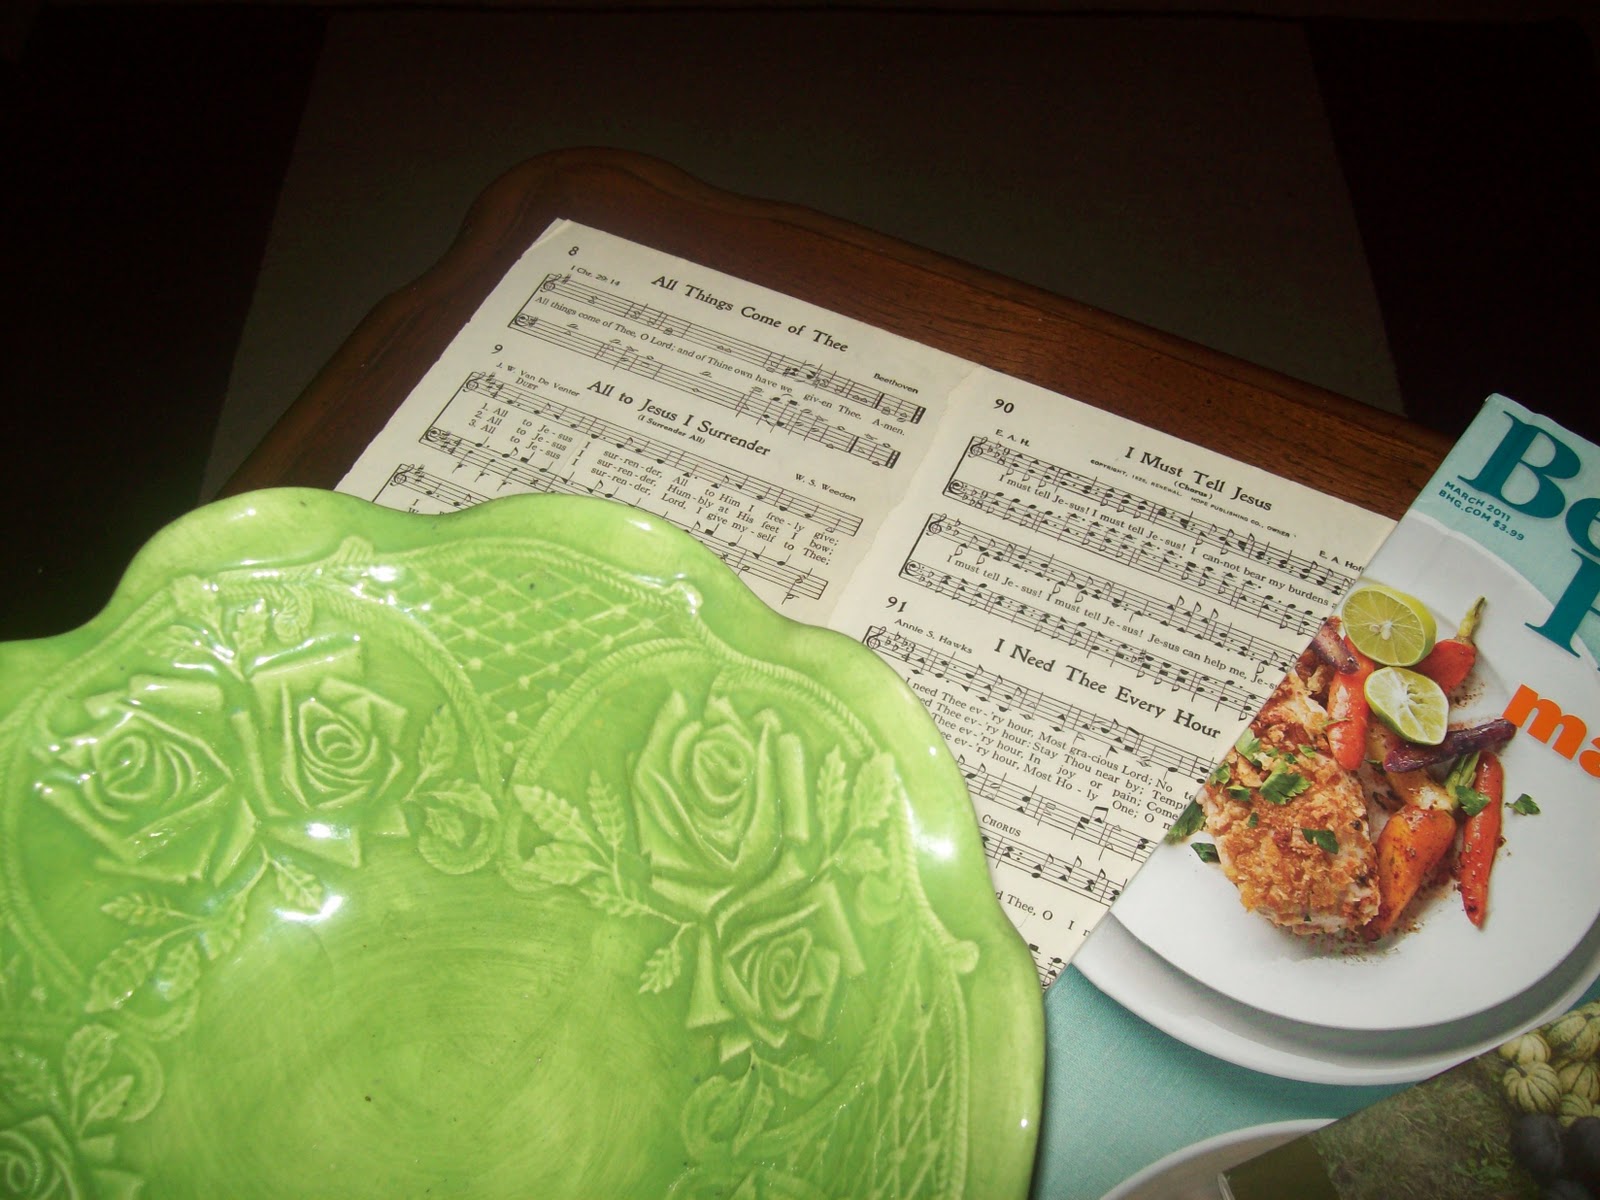
I used Modge Podge to attach the hymnal pages to the table, and then covered it again with a couple Modge Podge layers. I sat for EVER thinking about how I wanted to arrange the sheet music on the page, but in the end decided to just do them in a row and all going the same way to be most easily readable - why go into all the effort of choosing songs if you can't even read half of them anyway? I put a layer of acrylic spray as the last layer, just to help waterproof and give an extra layer of protection.

I am so very pleased with the result, and it is a beautiful piece in the room that is giving it a lot of love and character. I hope you all enjoy it as much as we truly do!
Gallery Wall Frames
I made it to Round 2... Hallelujah!!!
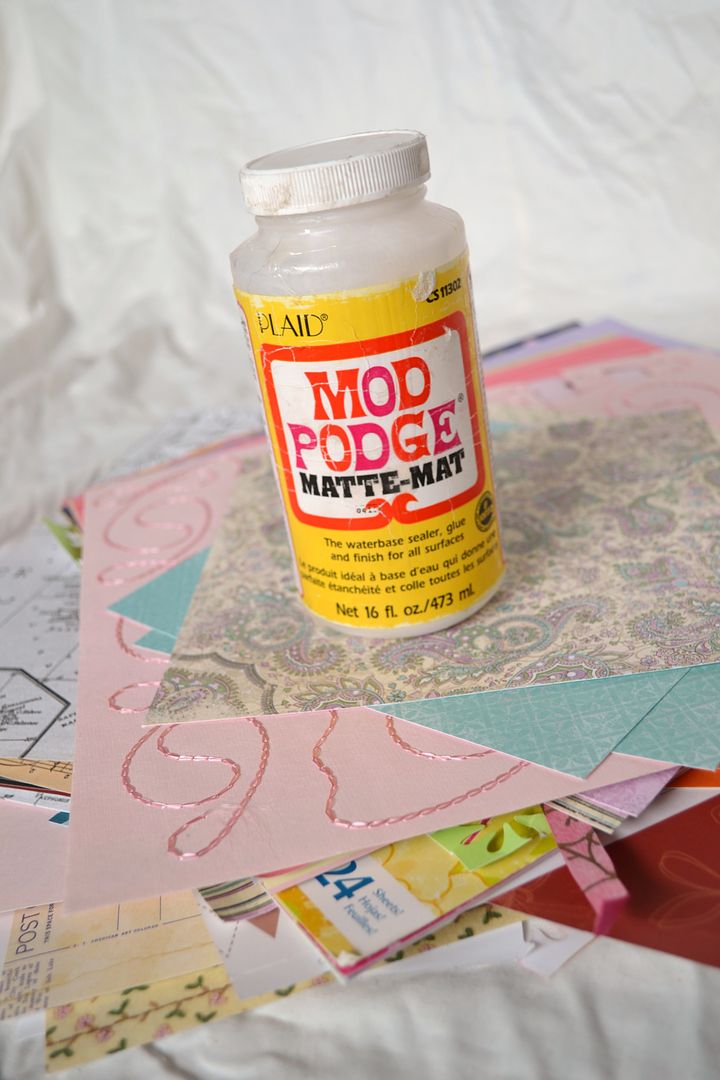
This may sound crazy, but I am not a huge Modge Podge user...I actually had to go buy myself a jar at Hobby Lobby! If I ever need it, I usually just make my own :) [3 parts glue to one part water] I felt like I needed to buy the real thing for a modge podge competition!

I'd been trying to decide what to do with my tiny bathroom... gallery wall, wall paper, stencil, stripes... so many options. Modge Podge inspired me to re-use things from around the house, and give boring, o l d frames some new life!
I decided to go with the FREE gallery wall!

This project proved to be super simple, and made a big impact! I used newspapers I saved from living in China and modge podge it to the frames.

Dress Form
create a tangible wearable something from just a piece
of woven threads! So, I make clothes for my kids,
other people, and other people's kids....but my poor closet
has been neglected. Sad, I know. But It's hard to do a fitting
for myself...awkward. So when my awesome friend explained
that I could make my own dress form with duct tape,
I was all over it!


 Yea!!
Yea!!
I knew exactly what I would do for this week's project.
My duct tape dress form was screaming for some color...
or was it screaming for some cute Michael Miller polka dots?
Hhmmm....
With some strips of fabric modpodged on and
coordinating ribbon at the base and neck it's both functional
and pretty!
Yea!!Laundry Cabinet Spruce-Up


I have a confession, though. I only used ModPodge on one shelf. It ended up bubbling and doing weird things on me, and I ultimately ended up using a spray adhesive for the rest of the shelves and then ModPodged just over the top to protect. THEN also sprayed with a sealant (laundry soap sometimes spills, ya know).
To add to the sprucing, I trimmed out the cabinet doors with lattice boards that I cut with a circular saw and then primed, painted, and caulked. I thought of doing them all with the wrapping paper, but it just felt a little overwhelming, so I decided to change it up by adding some burlap to the outside cupboards.
I have some awesome handles to put on, too, but I have to make another trip to the hardware store for new screws since the ones that come standard are too short for my new fancy trim ((sigh)). And I think I'll stick some cork behind those burlap pieces to make them functional, and I'll definitely be painting the inside of the doors with chalkboard paint! Love me some multi-tasking cabinets!

Map Footlocker

All the projects were so amazing last week! I'm thrilled I made it to the week 2 Mod Podge challenge! I LOVE Mod Podge and really should be buying it by the gallon! I must admit I have a million unfinished Mod Podge projects.
Did you know a thin layer of Mod Podge will transfer a printed image onto a wall or a piece of wood? Seriously....go try it!! It's a really cool process...one unfinished project is a back splash in my kitchen with transferred images of old family recipes...cool right? Maybe someone submitted such a project....mine is still unfinished.....
So I'm submitting my recently finished project.....
a Map covered footlocker.

Here's what I did:
I used Mod Podge to attach some thrift store maps to the footlocker.
Used a craft knife to cut around the hinges and smoothed out any air bubbles or wrinkles. Repeat overlapping maps until the footlocker is completely covered. Then last step apply 2-3 coats of Matte Mod Podge and DONE in less than an hour!

I hope it's your favorite so I can make it to next week's challenge:-)
Yarn Bangle
Woo hoo! Another week on One Month to Win It! I am so excited! :)
My project this week is a yarn wrapped flower bangle inspired by anthropologie!
Ready?

1. Cut 2 bangles from a paper towel roll or toilet paper roll.
2. Paint Mod Podge over the front of the first bangle and press the second bangle over it. This will add more stability to your bangle.
3. Wrap your bangles around the rest of the paper towel roll and put a rubber band around them while they are drying. This will make sure that they keep their shape while drying.
4. Now you can start wrapping the bangle in yarn!! Just paint some Mod Podge on and press the yarn on top of it.
5. Repeat step 4 until your entire bangle is covered.
6. You are done wrapping!! Now the embellishments....
7. Get a strip of fabric and start fringing it...
8. Start wrapping the fringe into a fun little flower.
9. Secure the end with a little hot glue. Then attach it to your bangle! I added a little bead embellishment to the center of mine!

Isn't it cute? I think these would make GREAT gifts!

Toy Box
So excited that I made the cut to week 2 and a Mod Podge theme. Seriously I love this stuff and I have used it pretty much everywhere throughout my house, as much as I have spent in years I should own some stock in the company ;) So to come up with just one idea to show off was pretty tough! I have thought about this long and hard and gone back and forth between ideas. So I decided to head to my local thrift store (retail inspiration!) and there it was sitting on the floor…

I know, not the prettiest (understatement of the year!) but I was super excited and I knew I had my project and the perfect home for this nasty old tool box. I offered the lady $5.00 and it was mine! I headed home with my new treasure and quickly got started.
When I got home I spray painted the tool box white. I know hard to part with that dirty red but white gave it a clean new start. Next up was making it pretty. I grabbed my stash of paper scraps and Mod Podge and got to work
Mod Podge and I go way back, but we have a sort of volatile relationship. (There have been a couple of projects in our history that didn't go well, and I think we each blamed the other for the failure.) However, for this challenge I thought we worked rather well together. (If anything, it was Paint and Camera who were uncooperative on this one.)
For this task, I Mod Podged an old wooden chair that has been in out backyard for years.
 This chair was a mess, but I'd been hanging onto it because it had nice lines.
 It was kind of rough and rickety (1) and the dog had actually chewed big chunks out of it (2). With a whole lot of spackle, I filled holes and basically created a whole new seat slat where the dog had chewed. The chair was sanded, primed, and the edges were sprayed with an apple green paint. (3) I then hand mixed acrylic paints to get the exact shade of green to match my fabric. Then I painted the chair with that.
I had been looking for scrapbook paper for this project, but this apple-sage green and cream geometric fabric practically jumped into my arms at JoAnn's. Taking care to keep the pattern straight and lined up, I cut the fabric into strips and Mod Podged them to the seat slats (4) and the back slats (5). When the whole thing was dry I mixed a wash of Mod Podge and watered-down gold paint and went over the whole piece. (6)
It took several attempts to get the paint and the wash just right. After all that careful mixing and painting, I cannot get the camera and lighting right so that the color of the chair comes out in the photos.
This photographs like a beige-green-gray, but really it is a soft apple green. (Gee, I sure wish you could see it.)
 I'm pleased with how it turned out. It is certainly better that it was as the dog's chew toy!

I simply cut out random sizes of squares out of the paper, some of the scraps we already perfect. Then arranged them and glued them down. Then added a layer of Mod Podge over the top. Wanna see the end result? What do you think?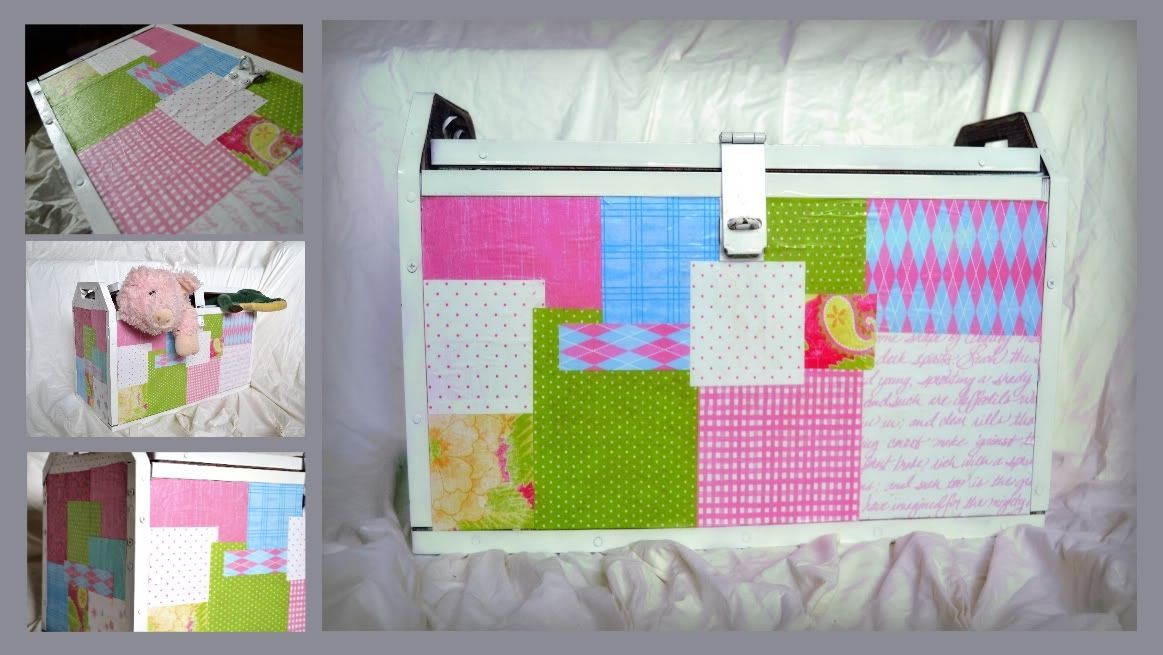

Does it make you want to run out and steal your husbands old tool box?! Best part is that I can also let this be an outside toy box. Happy voting and hopefully I will be back next week with a fun new project. Thanks
Chair Redo
First, can I just say how happy I am to be here for Round 2 of this competition?! Second, I must confess that Mod Podge week had me pretty stressed.Mod Podge and I go way back, but we have a sort of volatile relationship. (There have been a couple of projects in our history that didn't go well, and I think we each blamed the other for the failure.) However, for this challenge I thought we worked rather well together. (If anything, it was Paint and Camera who were uncooperative on this one.)
For this task, I Mod Podged an old wooden chair that has been in out backyard for years.
 This chair was a mess, but I'd been hanging onto it because it had nice lines.
 It was kind of rough and rickety (1) and the dog had actually chewed big chunks out of it (2). With a whole lot of spackle, I filled holes and basically created a whole new seat slat where the dog had chewed. The chair was sanded, primed, and the edges were sprayed with an apple green paint. (3) I then hand mixed acrylic paints to get the exact shade of green to match my fabric. Then I painted the chair with that.
I had been looking for scrapbook paper for this project, but this apple-sage green and cream geometric fabric practically jumped into my arms at JoAnn's. Taking care to keep the pattern straight and lined up, I cut the fabric into strips and Mod Podged them to the seat slats (4) and the back slats (5). When the whole thing was dry I mixed a wash of Mod Podge and watered-down gold paint and went over the whole piece. (6)
It took several attempts to get the paint and the wash just right. After all that careful mixing and painting, I cannot get the camera and lighting right so that the color of the chair comes out in the photos.
This photographs like a beige-green-gray, but really it is a soft apple green. (Gee, I sure wish you could see it.)
 I'm pleased with how it turned out. It is certainly better that it was as the dog's chew toy!
Tiered Dessert Stand
One of my hobbies besides crafting is baking so for this week's challenge I decided to make myself a spring inspired tiered dessert stand!
To make this I purchased 3 plates at a thrift shop and two wooden table legs from a local hardware store. I cut one of the table legs into two parts. Then I drilled holes through the plates and table legs and spray painted everything white.
Once the prep work was done I used Mod Podge to glue fabric to the top, bottom, and rim of each plate. I put several coats on so it would have a nice smooth finish. Then I used white puff paint to make a little dotted border inside each plate rim. Lastly I put a threaded rod through all of the pieces and used a bolt on the bottom of the largest plate and inside the top round white ball to hold everything together so it's nice and sturdy (and also comes apart for easy storage). The puff paint is non-toxic and the mod podge is the outdoor variety which is also non-toxic, water resistant and wipeable, all perfect for food serving!


Once again, amazing job ladies!
ReplyDeleteFabulous entries!
ReplyDeleteOh what great projects!!
ReplyDeleteoh a tough one to vote on! I will tell you my top three... dress form, Map foot locker and chair re-do!!! Love them!!!
ReplyDeleteGee. I never used to bite my nails...
ReplyDeleteSuch great ideas!! I love em all! :)
ReplyDeleteWOWZERS! Hard to choose...SO hard to choose. I didn't even know your challenge for this week and I did a mod podge project too. I must be psychic!
ReplyDeleteI did an expeiment to see if I could mod podge a fabric lampshade, it worked!
http://kim-toomuchtimeonmyhands.blogspot.com/2011/04/one-unique-lamp.html
I love this voting idea! How do I get to be on it? :-) I did a mod podge wall art map and a mod podge lamp shade (made from scrapbook paper) I would have for sure entered :-)
ReplyDeletehiya , wow , all fab entries and sooooo creative , not an easy decision !!!!:( tfs and hope to join in soon
ReplyDeletexmaggiex
Ack! So many cute projects. You go girls!!
ReplyDeleteIt was really tough to pick this week! Great job everyone....and thanks for inspiring a project of my own!
ReplyDeleteI usually throw broken things away, maybe I'll just get out some spackle, paint, fabric and Mod Podge next time!
ReplyDelete