All of the ladies deserve a big round of applause! What a great season! Be sure to check out all of the Season 4 contestants and their blogs!
Did you love this week's theme? Can't get enough beach themed projects?
The Country Chic Cottage is having a beach bash party June 27 to July 20! Former OMTWI contestants will be strutting their stuff and coming up with great beach themed projects! Come join in the fun!!
Thanks for following along for another great season! Season 5 will start Sunday! Then OMTWI will be on a short vacation but will be back soon!
Time for the Beach Bash!! Scroll to the bottom to vote for your fave! This week is the finale! Contestants were asked to make a beach themed project! Let's see what they have got!
Beach Towel Rompers
From BEACH TOWEL to BEACH WOW! You are going to love these Beach Towel Rompers for all of your Beach Bash Parties this Summer!
Each Beach Towel Romper is made of a single towel and fits perfectly over your swim suit. Wear the Beach Romper to the Beach or to all of your Pool Parties this Summer.
There was even had enough towel left over to make a coordinating beach bag!
You guys coming to the BEACH PARTY??
Anchor's Aweigh! - A Nod to the Nautical
I don't know about you, but I am LOVING all the nautical inspiration lately - it's everywhere! Outdoor decor, homegoods and clothing lines! I fell in love with Shabby Apple's new line immediately upon seeing it. I decided that since this week's theme was "beach" there was no better way to give a nod to my new favorite trend than making a family of nautically inspired outfits!
For the fashionably nautical husband - a blue and white striped necktie (doubles as a Farther's Day present!). For the little mister - easy, breezy elastic waist checked shorts and an adorable striped bow tie to match dad. For the little miss - a paneled circle skirt complete with seashell-collecting pocket on the front, along with a matching headband. And for mom - a simple striped boatneck T with a crocheted lace-embellished, lightweight cardigan and a few accessories.
Each item was made without a pattern or tutorial. The boatneck t-shirt and yellow cardigan are refshions - though everything else was constructed from scratch. There was much sewing, dyeing, hot gluing (for the earrings and ring - not the clothes!), and some swearing - I'm not gonna lie. But in the end, our family of nautical-wear turned out precisely as I'd imagined it.
Perfect comfy clothes for looking chic and stylish at the beach - whether you are:
searching for shells, skipping stones, enjoying a good book, fishing, bird watching, taking a stroll or just enjoying the view.
Beach Themed Art
I am so excited to be in the final round this season! I have been looking forward to our beach themed week all month! We don't live near water but vacation to the beach frequently.
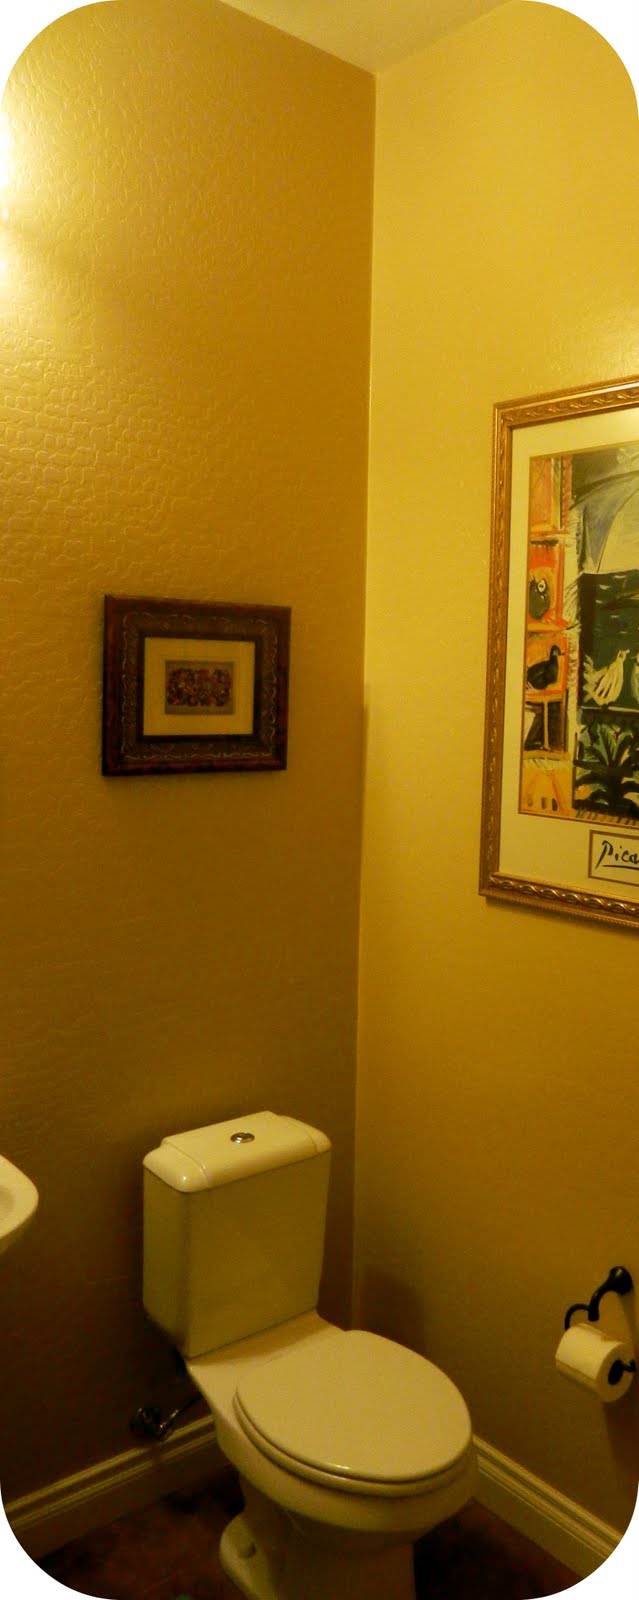
We have a small bathroom that is generally only used by guests. This was the perfect space to get creative with my beach themed project!
The transformation started with new art. I used three 12" x 24" canvases to create something fun. I love how the blue circles in the background give this a pop art feel!
Initially I planned to paint the largest wall of the bathroom blue but when I started using the stencil on the canvases, I knew it had to be added to the wall too.
I'm anxious to show you the rest of this space! Come visit me next week for more pictures and details about this project.
Thanks for letting me participate this month! I've had so much fun!
This week's theme is Beach Bash! Anything beach related goes! This is the finals...can't wait to see the projects tomorrow! Stop by and vote for your fave! For now how about some beachy inspiration from our judges!
Thanks for participating ladies! Stay tuned Sunday as we announce the theme for the finals!! And Monday the finale projects will be up for vote!! Plus we will be announcing the Season 5 contestants soon!
This week contestants were asked to submit a craft that could be made by kids! Get ready to find some great boredom busters for your kids!! Scroll to the bottom of this post to vote for your fave!
Handmade Journal
This week was very exciting for me because crafting with kids is a daily activity in our home. I had so many wonderful ideas swirling around in my mind but I was careful to choose something that both boys and girls in different age groups would enjoy making. I had a difficult time taking pictures of us making the craft with out revealing my identity. My little one was so cute and excited while working on this project with me!
I love using freezer paper stenciling to paint fabric. My toddler is too young to carefully paint in a stencil but I thought it would be fun to let her paint over the freezer paper and then peel off the paper to reveal the unpainted fabric beneath. She thought this was incredible. Older kids could cut out their own stencils and carefully paint them to reveal very intricate designs.
We were already really messy so I decided to let my daughter make handprints on white fabric. I love that she chose different colors for each hand!
At this point you could use the painted fabric for a frame or let older kids practice sewing by hand (a pillow, doll clothes, etc.). I used our fabric to make a three ring binder cover. Then I used sheet protectors to fill the binder with blank frames and journal entry pages. I asked my daughter questions about one of our recent outings and wrote her responses on one of the journal entry pages. Older kids could fill this out themselves. My daughter picked out her favorite picture from the day and I attached it to the journal entry with adhesive photo corners. Lastly I had my daughter draw a picture about all the fun she had during our outing.
I'm really looking forward to filling our book with my daughter's favorite memories this year. This journal will provide us with so many opportunities to chat about our experiences and get creative with the frames. The crafting opportunities are really endless - crayons, paint, glitter, etc., etc., etc.!!
Clay Flowers
This week was very interesting for me considering the fact that I don't have kids yet...BUT I thought back to what I liked to do as a kid and wanted to share this craft with you.
When I was younger I discovered Sculpey clay during a summer art class. This is a type of clay that you can form and then bake to harden. Of course there's a ton of things you can do with clay, but I want to show you some fun flower accessories. Sculpey comes in all sorts of colors (you can mix them too, like paint), and I was feeling daisy-ish so I picked up some white, yellow, and green packages of clay. I would recommend this craft for kids (probably girls) ages 7+. It would be awesome for party!
You can make round flower beads by rolling long logs: one yellow in the center and 6 surrounding it. Wrap the whole log in a thin sheet (you can use a rolling pin) of a coordinating color, then slice 1/4" thick beads like you would cookie dough. Mold pieces of green clay into leaf-like shapes and use a butter knife to create the veins. Using a safety pin, poke a hole through the sides of your beads and bake. I strung mine on some clear elastic.
For roses, you can roll a small piece into a log and flatten it, then wrap it into a spiral. Add some leaves if you like and bake. Glue them in a row onto a barrette for a sweet hair accessory. There are so many options, and you don't need any special "clay" tools. For inspiration, print out pictures of common flowers and have the kids try to copy the look.
One of the nice things about this craft is that it's cool for moms too. A large flower on a pin makes a great accent to a purse or plain jacket!
My favorite kind of kid craft is the one you do WITH the kids, so I hope you'll try this one out with some kids you know and make something awesome for yourself too :)
Decoupage Yogurt Containers
I set out watered down white glue, paint brushes, magazines, and empty yogurt containers, and let the kids go at it!
I think they did a fantastic job. Now these beautiful containers can hold all the supplies needed to make Summer run a little smoother. We put in some markers, chalk, crayons, pens, pencils, and scissors, but they would totally work for collections of shells, rocks, and string (you know, the important stuff of life). Plus, the containers are being re-purposed and saved from the landfill...and I love that.
They love the name "Decoupage". It sounds so fancy.
Oh yeah. There will be some creating going on here!
We are organized and ready.
Bring on the Summer!
Parade in a Box
Everyone loves a parade! Especially the kiddos. The colors! The
sounds! The marching! The waving! What's not to love? My
kids and I decided to make ourselves a Parade in a Box - something fun that we can
enjoy all Summer long.
Using items that you probably already have in your home, you can make a parade in a
box as well! Our parade consisted of a kazoo, a bugle, a xylophone, a drum set
and maracas. (Yes, I know maracas aren't typically found in marching bands,
but when your very determined child insists on them, you're automatically outvoted.)
We also made some flags to wave - because what's the fun of a parade without
exuberant spectators? All of these instruments were made with common items
- a garden hose connector, a funnel, craft sticks, rubber bands, buckets, cardboard,
plastic Easter eggs, beans, skinny wooden dowels, small wooden knobs/beads,
different sized pipes, paper, felt, and lots and LOTS of duct tape!
Did you know you can decorate with duct tape? It's perfect for plastic items and
things that are not easily paintable. You can have your kids cut out shapes if
they are old enough, or you can precut them and have the kids stick them on! It's
easy to do, less messy than paint, and less expensive than buying vinyl and a cricut
machine! The kids can also help assemble all of the items - most of them
are easy to put together with just a few simple steps and use only tape and/or glue.
The flags are of super simple construction - only felt, dowels, ribbons and glue.
Our box is an old crate I found for a dollar at the thrift store. I simply used
our staple gun to attach two vinyl handles to the sides for easy transport.
And the best part, they are fun and easy to play! Even the smallest of hands
will want to march along with these fun homemade instruments. What child
doesn't want to make LOTS OF NOISE?? When you're ready for your parade,
the box itself becomes the perfect spot to sit and cheer. Throw in some fun hats,
and you've got yourself a summertime winner! A DIY parade that's ready to go
whenever you are? Boredom BUSTED.
Portable Games
For this challenge I decided to create small, portable games that kids could not only play with but they could make themselves. Using some candy and scrapbooking tins I already had, my supply of magnetic credit cards and advertisements, craft paper, glue sticks and stickers I created three different types of games.
For this first one, you would trace the shapes onto colored paper and have the kids cut them out and glue them onto the magnets. Depending on their age and ability, they could do the tracing and all of the cutting themselves. This game teaches colors and shapes.
Suggested Activities: Ask your child to
make a row of all of one shape
make a row of green triangles, red triangles, etc.
follow a pattern you give them i.e. red square, green triangle, yellow circle then repeat
The second game is for teaching letter recognition and spelling. Children could stamp the letters onto the cardstock with rubber stamps or you can print the alphabet out on the computer (which is what I did) and have them glue the letters to the magnet. They can cut these in random shapes. Suggested Activities: Ask your child to
Put up the letter of the sound you give them
Spell words you give them
Finally I created what I call the "Freestyle" Set which consists of all different shapes. I cut out a shape for each bag and glued it on so kids would know where the pieces go when they're finished. Kids can decorate the lids with printed paper, stickers, glitter, rhinestones -- whatever you have on hand.
The magnet pieces I used were all thin enough that I could use my punches to punch out circles and other shapes. If this is not the case with the magnets you have, you can cut them free hand yourself or as I said, depending on your child's age and ability, have them do all of the cutting. These are handy things to keep in the car or your purse for those times you're waiting at the doctor's office, in a line at the store or on a long car trip!
Toothbrush Bracelets
Are your kids already bored this Summer?
I have a solution! A kid friendly, easy-to-do, adult supervision required Kid Craft: Toothbrush Bracelets!
They can be new or old plastic toothbrushes. Just round up a bunch of kids, you can even invite the neighbors. Don't forget to have them bring their toothbrush.
The color options are endless and they are a breeze to make.
This week contestants will be asked to make a craft that kid's can make!! Get ready for some summer boredom busters! Come back here tomorrow for the contestant crafts and to vote for your fave!! For now let's see some inspiration posts from our judges!!